forkstat (8) – a tool to show process fork/exec/exit activity
High load without a single obvious CPU consuming process (not related to the Nextcloud shenanigans above) led me to forkstat(8):
Forkstat is a program that logs process fork(), exec(), exit(), coredump and process name change activity. It is useful for monitoring system behaviour and to track down rogue processes that are spawning off processes and potentially abusing the system.
$ sudo tee /etc/apt/sources.list.d/mozillateam-ppa.list <<Here
deb https://ppa.launchpadcontent.net/mozillateam/ppa/ubuntu jammy main
deb-src https://ppa.launchpadcontent.net/mozillateam/ppa/ubuntu jammy main
Here
$ sudo tee /etc/apt/trusted.gpg.d/mozillateam.asc < <(curl 'https://keyserver.ubuntu.com/pks/lookup?op=get&search=0x0ab215679c571d1c8325275b9bdb3d89ce49ec21')
Nach etlichen Sekunden-Stromausfällen, durchaus auch mal in schneller Folge nacheinander, hatte mich ein 40-minütiger Stromausfall endgültig über die Kante geschubst, und ich wollte meine Rechner mit unterbrechungsfreien Stromversorgungen ausstatten.
Ziel war eine USV-Integration, die:
Den angeschlossenen Rechner bei Stromausfall zuverlässig herunterfährt.
Und ihn auch zuverlässig wieder startet.
Utopische Batterielaufzeiten, um irgendwelche Uptimes zu retten, sind bei mir kein Thema, denn alle Systeme, die keine Eingabe einer Passphrase benötigen (also alle bis auf eines), reboote ich wöchentlich aus der Crontab.
First things first: Warum nicht den Marktführer? Warum nicht … APC?
Meine Meinung zu APC ist nicht die beste. Zum einen stört mich enorm, dass APC gefühlt immer noch die exakt selbe Hardware verkauft, sogar original ohne USB, die ich in einem anderen Jahrhundert(!) als Vertriebler im Großhandel verhökert habe. Der apcupsd für Linux scheint seit Ewigkeiten unmaintained, und die Hinweise zu den APC-Hardwaregenerationen bei den Network UPS Tools sind alles andere als ermutigend.
Hardwareauswahl
Der Weg zur richtigen Hardware, die die gewünschte Integration leistet, war steinig und von sehr schweren Pappkartons begleitet.
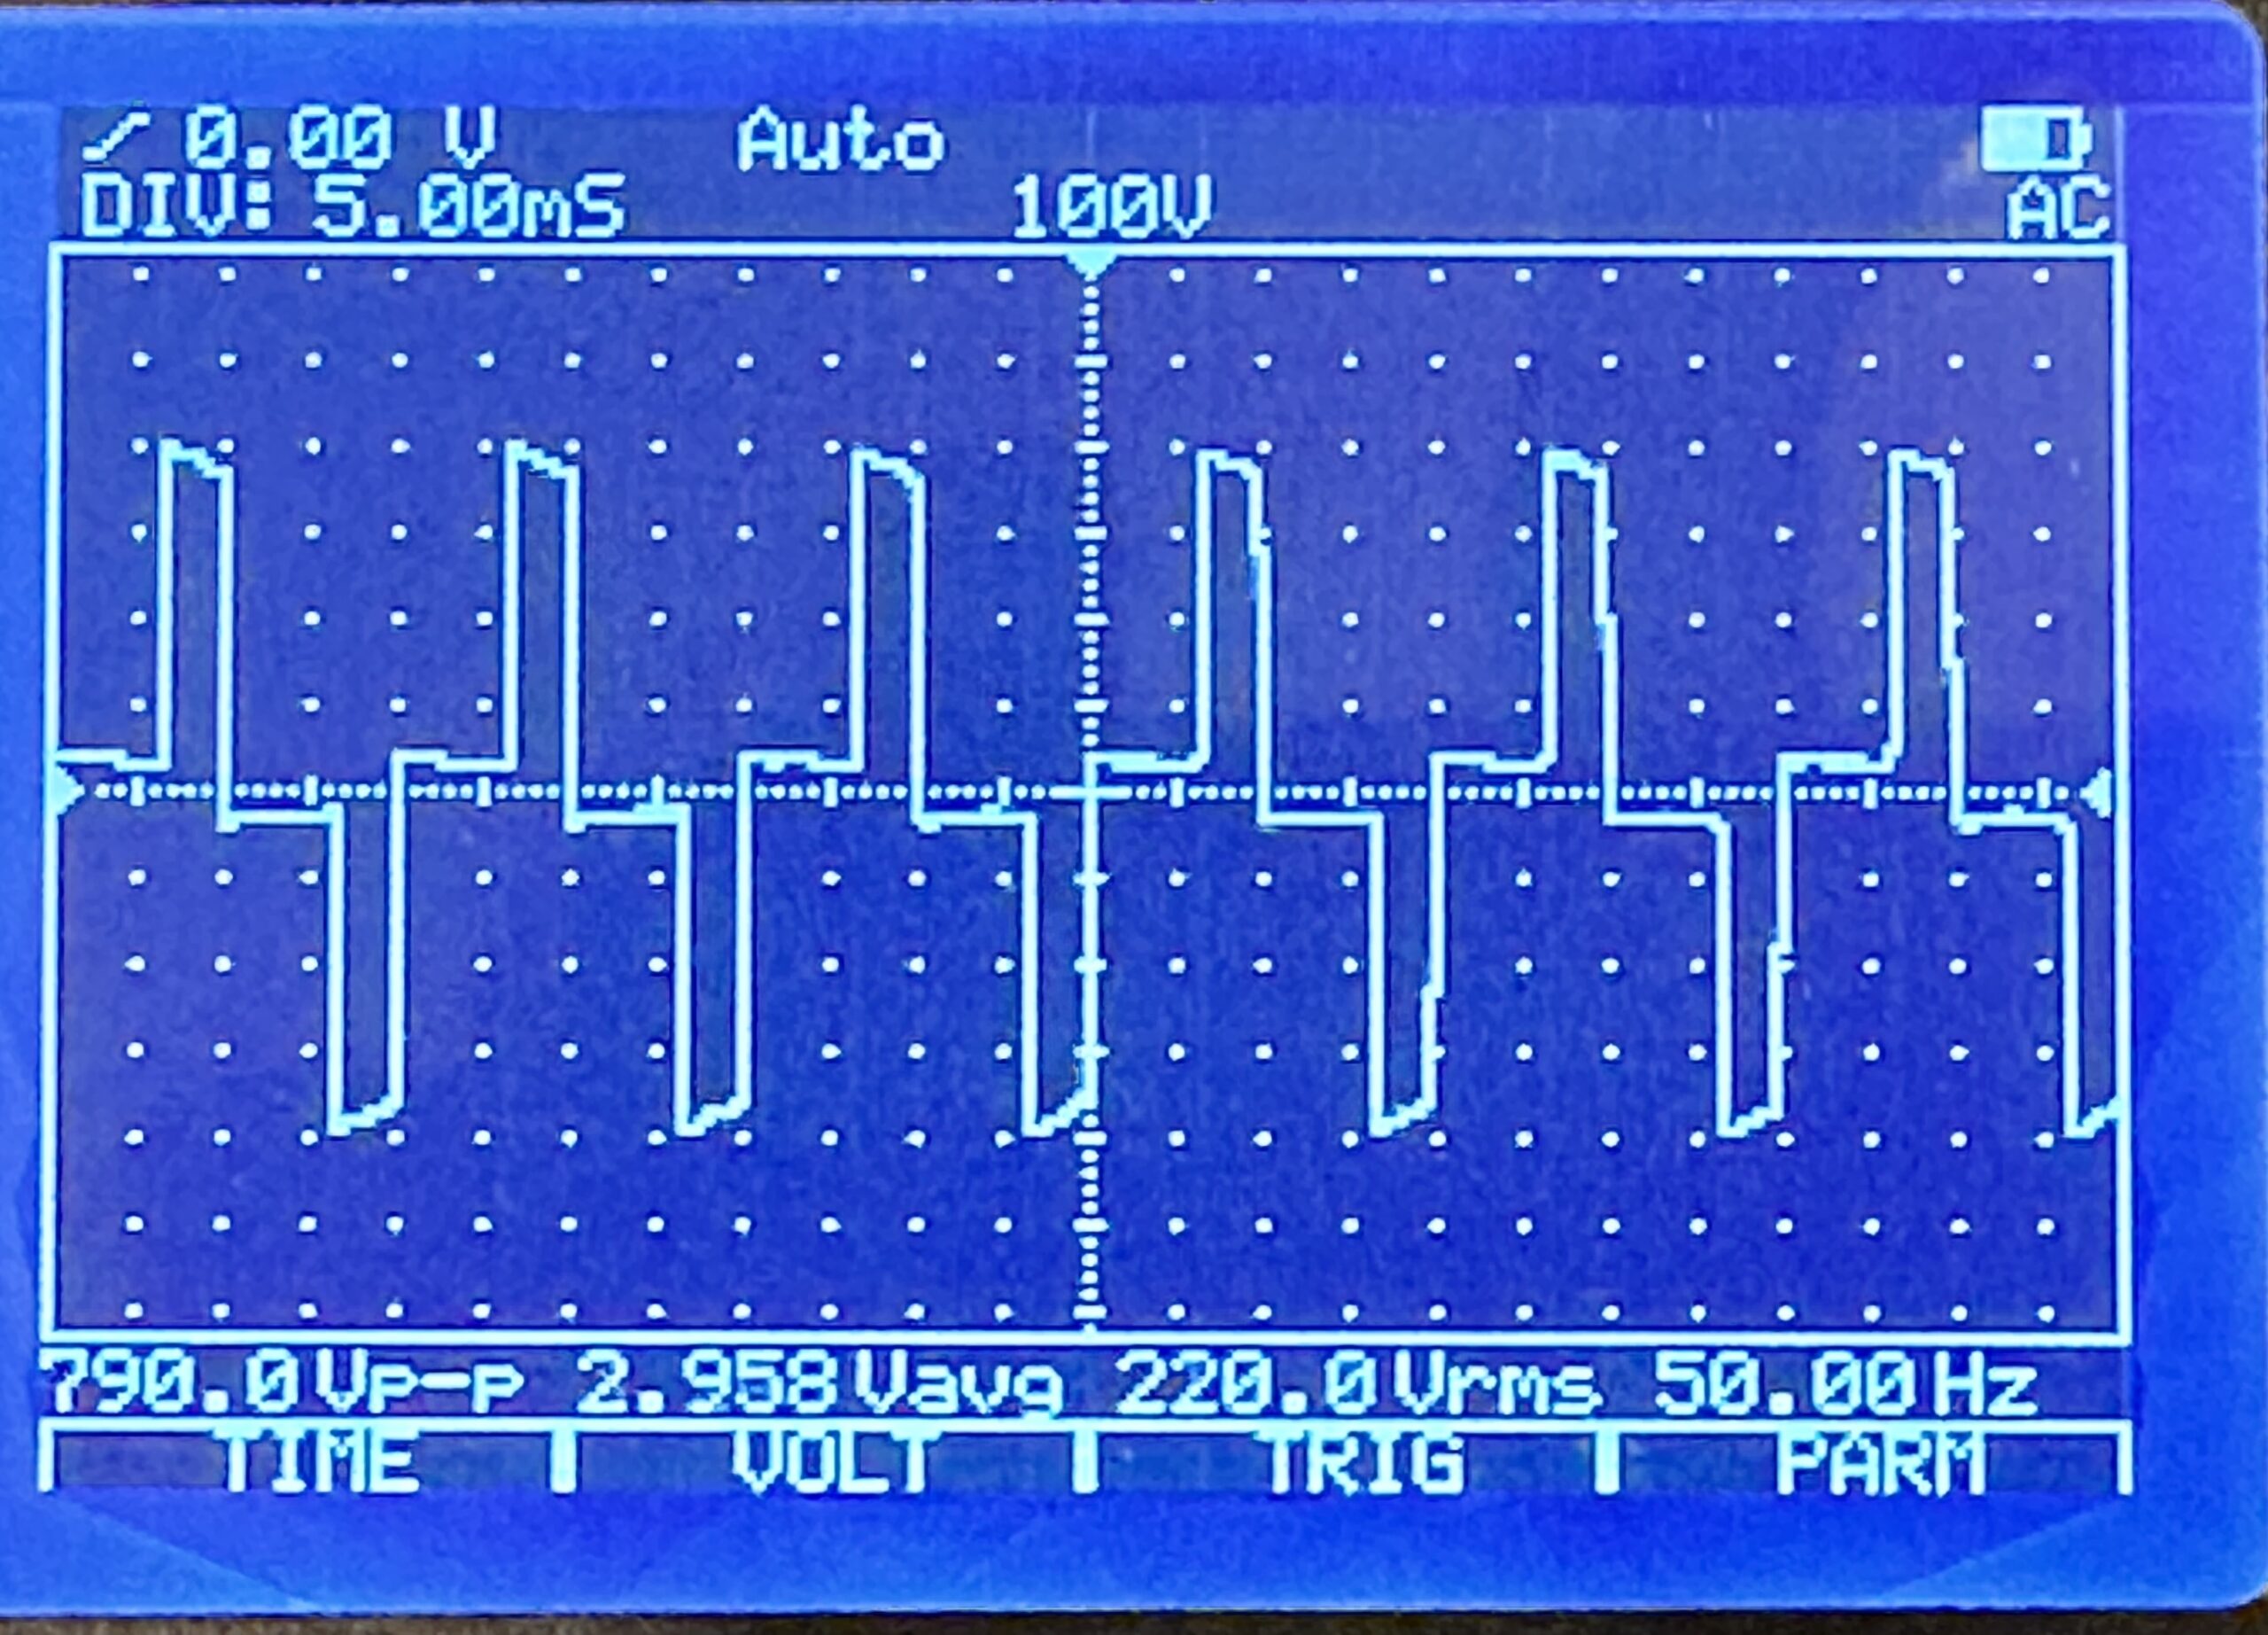
Für die meisten Anwendungsfälle tut es tatsächlich die wirklich billig-billige 50-Euro-USV von “BlueWalker PowerWalker”, wie sie der kleine Computerladen im Nachbardorf in allen Ausprägungen führt. Der Sinus ist hier allerdings nicht wirklich rund, sondern sehr sehr eckig, so dass er nicht mit jedem PC-Netzteil harmoniert.
Ein Gerät aus der “CSW”-Serie, “Clean Sine Wave” für ca. 150 Euro ebenfalls von “BlueWalker PowerWalker” weigerte sich, das System nach Wiederherstellung der Stromversorgung zuverlässig wieder hoch zu fahren.
Eine “Cyberpower”-USV hatte das beste User-Interface direkt am Panel, zählte die Sekunden der jeweiligen Timings live runter, war aber leider Dead On Arrival mit einem Akku, der wie ein Stein runterfiel, ohne dem angeschlossenen System wenigstens mal 30 Sekunden Zeit zum Runterfahren zu geben.
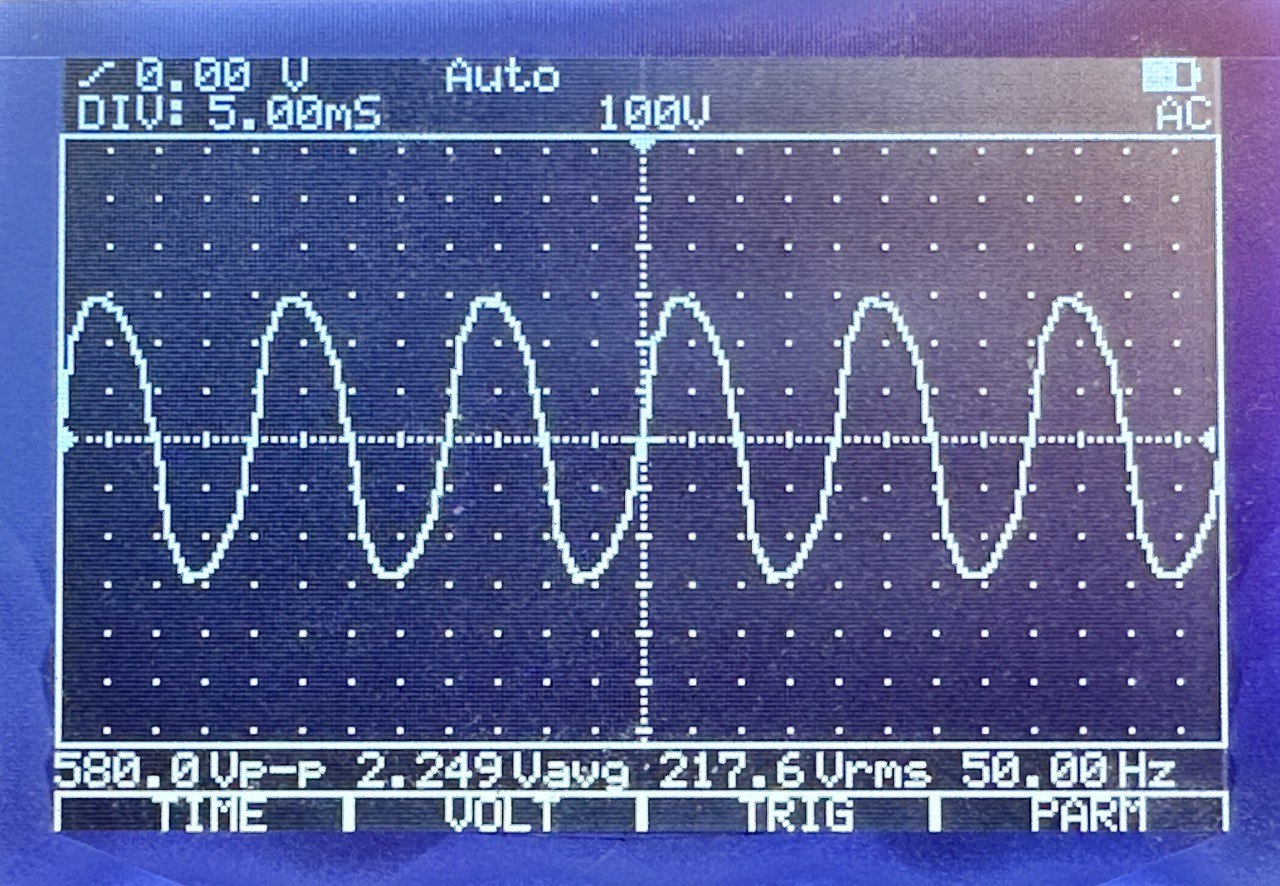
Nachdem ich einige Wochen Frust geschoben hatte, ging es wieder mit einer PowerWackler weiter, diesmal mit der BlueWalker PowerWalker VI 800 SW. Ein Billiggerät, sieht billig aus, hat ein aus einem Blickwinkel von ca. 0.5 Grad ablesbares LC-Display, und: Funktioniert! Der Sinus ist ulkig windschief, das tut der Funktion aber keinen Abbruch.
Integration
Nach den ersten Tests und der Erkundung der Möglichkeiten, standen meine Wünsche endgültig fest:
30 Sekunden nach dem Stromausfall soll das System runterfahren.
Kommt innerhalb der 30 Sekunden der Strom wieder, soll der Shutdown abgebrochen werden.
60 Sekunden nach dem Shutdown soll das System ausgeschaltet werden.
Kommt während oder nach dem Shutdown der Strom wieder, soll die USV wissen, dass sie das Ding jetzt durchziehen und das System trotzdem aus- und nach einer Wartezeit wieder einschalten soll.
Ist der Stromausfall beendet, soll das System wieder automatisch eingeschaltet werden.
Mit der richtigen USV ist all das problemlos zu konfigurieren. Leider habe ich mir ärgerlich viel Zeit um die Ohren geschlagen, weil ich immer wieder Fehler auf meinem System in meiner Konfiguration gesucht habe.
NUT-Architektur
Die Network UPS Tools (“NUT”) teilen ihren Stack in 3 1/2 Schichten auf:
Der NUT-Treiber übernimmt die Kommunikation mit der USV und stellt sie modellunabhängig den nachgeordneten Schichten zur Verfügung.
Der NUT-Server stellt die Events der USV per TCP bereit, für localhost, oder auch für per Netzwerk angebundene Systeme, die keine lokale USV haben.
Der NUT-Monitor reagiert auf Events, die er vom Server erhält, hierbei kann der Server entweder lokal laufen, oder über das Netzwerk erreicht werden.
Der NUT-Scheduler als Teil des NUT-Monitor führt diese Events aus und verfolgt sie im zeitlichen Ablauf.
Ich habe mich überall für Konfigurationen vom Typ “Netserver” entschieden, bei denen aber der NUT-Server hinter einer lokalen Firewall für Verbindungen von außen geblockt ist.
NUT-Treiber
Der NUT-Treiber ist, wenn man einmal akzeptiert hat, dass die USVen alle buggy Firmware haben und man nie bei NUT die Schuld für Fehlfunktionen zu suchen hat, ganz einfach zu konfigurieren. Außer der Auswahl des passenden Subtreibers ist lediglich zu beachten, dass die USV-Firmwares die Timings mal in Sekunden, mal in Minuten und mal gemischt(!) entgegennehmen. Bei manchen darf auch kein ondelay von unter 3 Minuten konfiguriert werden. Was weiß denn ich. Eine /etc/nut/ups.conf:
# /etc/nut/ups.conf für BlueWalker PowerWalker VI 800 SW
maxretry = 3 # Erforderlich

[ups]
        driver = blazer_usb # Wahrscheinlichste Alternative: usbhid-ups
        port = auto
        offdelay = 60       # Zeit bis zum Ausschalten nach Shutdown in Sekunden
        ondelay = 3         # Mindestwartezeit bis zum Wiedereinschalten in Minuten
NUT-Server
Der NUT-Server ist etwas unübersichtlich zu konfigurieren, insbesondere bei der Rollenzuweisung im Rahmen seiner Userverwaltung. Die zentrale Konfigurationsdatei /etc/nut/nut.conf ist aber noch äußerst übersichtlich:
# /etc/nut/nut.conf
MODE=netserver
/etc/nut/upsd.confhabe ich inhaltlich leer gelassen (Voreinstellung, alles auskommentiert), hier können für den Netzwerkbetrieb Zertifikate und/oder für den lokalen Betrieb die Bindung auf Localhost konfiguriert werden.
In /etc/nut/upsd.users wird der User angelegt, mit dem sich der NUT-Monitor beim Server anmelden wird. Bei “upsmon master” scheint es sich um eine Art Macro zu handeln, das bestimmte Rechte für den User vorkonfiguriert; die Doku ist nicht allzu verständlich und es ist möglich, dass die expliziten “actions” hier redundant konfiguriert sind. Ansonsten wird hier explizit festgelegt, dass der User “upsmon” mit dem Passwort “xxx” “Instant Commands” an die USV senden darf, dass er mit SET diverse Einstellungen an ihr vornehmen darf, und dass er den FSD, den Forced Shutdown, einleiten darf.
# /etc/nut/upsd.users
[upsmon]
        password = xxx
        instcmds = ALL
        actions = SET
        actions = FSD
        upsmon master
NUT-Monitor
Der NUT-Monitor ist die Kernkomponente, die tatsächlich den Shutdown des Systems einleiten und/oder abbrechen wird.
Zunächst muss die Kommunikation mit der USV namens “ups” mit dem User “upsmon” etabliert werden. “master” bedeutet, dass die USV hier am System lokal angeschlossen ist, die 1 ist eine Metrik für den Fall, dass mehrere USVen angeschlossen sind. Erhaltene Events werden an den NUT-Scheduler delegiert, und es sollen ausschließlich die Events ONLINE und ONBATT behandelt werden.Hier nur die relevanten zu ändernden Zeilen aus /etc/nut/upsmon.conf:
Dem NUT-Scheduler wird der Pfad zu einem Shellscript übergeben, das den Shutdown des Systems handhaben wird. Die beiden Werte PIPEFN und LOCKFN haben keine Voreinstellungen und müssen sinnvoll belegt werden. Hier die komplette /etc/nut/upssched.conf:
# /etc/nut/upssched.conf
# https://networkupstools.org/docs/user-manual.chunked/ar01s07.html
CMDSCRIPT /usr/local/sbin/upssched-cmd
PIPEFN /run/nut/upssched.pipe
LOCKFN /run/nut/upssched.lock
AT ONBATT * START-TIMER onbatteryshutdown 30
AT ONLINE * CANCEL-TIMER onbatteryshutdown
AT ONBATT * EXECUTE onbattery
AT ONLINE * EXECUTE online
Wenn der Event ONBATT behandelt wird, die USV sich also im Batteriebetrieb befindet:
Wird ein Timer gestartet, der in 30 Sekunden das CMDSCRIPT mit dem Argument onbatteryshutdown ausführen wird.
Wird das CMDSCRIPT ausgeführt mit dem Argument onbattery, das die eingeloggten User über den Stromausfall und den in 30 Sekunden bevorstehenden Shutdown informiert.
Wenn der Event ONLINE behandelt wird, die USV sich also nicht mehr im Batteriebetrieb befindet:
Wird der zuvor gestartete Timer abgebrochen.
Wird das CMDSCRIPT ausgeführt mit dem Argument online, das die eingeloggten User über den abgebrochenen Shutdown informiert.
CMDSCRIPT /usr/local/sbin/upssched-cmd
Das Herz des Systems ist natürlich in liebevoller Manufakturqualität selbstgescriptet. Der Shutdown selbst wird mit /sbin/upsmon -c fsd bei NUT-Server in Auftrag gegeben, der theoretisch auch noch die Aufgabe hätte, die Shutdowns von per Netzwerk angebundenen Systemen abzuwarten. Bei diesem Forced Shutdown sagt NUT-Server der USV Bescheid, dass der Shutdown jetzt durchgezogen wird und sie nach der im NUT-Treiber konfigurierten offdelay die Stromversorgung auch wirklich aus- und nach Wiederherstellung der Stromversorgung, oder einer Mindestwartezeit, wieder einschalten soll.
#!/usr/bin/env bash
me_path="$(readlink -f "$0")"

case "${1}" in
        'onbattery')
                /usr/bin/logger -p daemon.warn -t "${me_path}" "UPS on battery."
                /usr/bin/wall <<-Here
                $(figlet -f small BLACKOUT)
                $(figlet -f small BLACKOUT)
                +++++ SYSTEM WILL SHUT DOWN IN 30 SECONDS. +++++
                Here
                ;;
        'onbatteryshutdown')
                /usr/bin/logger -p daemon.crit -t "${me_path}" "UPS on battery, forcing shutdown."
                /usr/bin/wall <<-Here
                $(figlet -f small BLACKOUT)
                $(figlet -f small BLACKOUT)
                +++++ SYSTEM IS SHUTTING DOWN  N O W. +++++
                Here
                /sbin/upsmon -c fsd
                ;;
        'online')
                /usr/bin/logger -p daemon.warn -t "${me_path}" "UPS no longer on battery."
                /usr/bin/wall <<-Here
                $(figlet -f small SHUTDOWN)
                $(figlet -f small ABORTED)
                Power restored. Shutdown aborted. Have a nice day. <3
                Here
                ;;
        *)
                /usr/bin/logger -p daemon.info -t "${me_path}" "Unrecognized command: ${1}"
                echo '?'
                ;;
esac
…and this is how it’s done, the simplest way possible. I initially heard about this technique from Jan-Piet Mens, a large-scale fiddler unlike me, and have fully committed to it.
Write a Markdown file with a manpage structure and a tiny bit of syntactic legalese at the top. I’ll call mine demo.7.md, but I’ve also gone with having it double as a README.md in the past.
% demo(7) | A demo manual page

# Name

**demo** - A demo manual page

# Synopsis

`demo` (No arguments are supported)

# History

Introduced as an example on a random blog post

# See also

* pandoc(1)
Convert to a manual page markup using pandoc(1) and view the manpage:
pandoc --standalone --to man demo.7.md -o demo.7
man -l demo.7
That’s your quick-and-dirty WYSIWYG manual page.
(Update Sep. 29, 2023: Fixed missing “.7” in final man -l invocation.)
Disable the dynamic motd on Ubuntu and everywhere else
This is without messing around in /etc/pam.dor doing things that may be reverted by future updates. Remember to systemctl enable disable-dynamic-motd.timer.
# /etc/systemd/system/disable-dynamic-motd.timer
[Unit]
Description=Disable all the dynamic-motd scriptlets (timer)

[Timer]
OnBootSec=10
OnActiveSec=3600

[Install]
WantedBy=timers.target
# /etc/systemd/system/disable-dynamic-motd.service
[Unit]
Description=Disable all the dynamic-motd scriptlets (service)

[Service]
Type=oneshot
ExecStart=sh -c 'chmod -v -x /etc/update-motd.d/*'
Disable verbose logging on realmd.service
Problem on AD-member Linux client, realmd logs thousands of redundant messages:
Feb 01 11:11:34 kvm-28ca realmd[22302]: client using service: :1.1042
Feb 01 11:11:34 kvm-28ca realmd[22302]: holding daemon: :1.1042
Feb 01 11:11:34 kvm-28ca realmd[22302]: client gone away: :1.1042
Feb 01 11:11:34 kvm-28ca realmd[22302]: released daemon: :1.1042
Solution, disable debug logging in the systemd unit by introducing this drop-in:
dpkg –compare-versions is not exactly a secret, but I’ve wrapped a script around it to visualize and better wrap my head around non-straightforward naming schemes:
Ich bin wirklich dazu übergangen, mich komplett auf systemd-Timer statt Crontab-Einträge einzulassen, lediglich die Zeitangaben für kalendergebundene Events machen mir dauerhaft zu schaffen. Mir ist ein Rätsel, dass die allwissenden systemd-Entwickler darauf verzichtet haben, eine zusätzliche Konfigurationsmöglichkeit über die bekannten, selbsterklärenden und intuitiv verständlichen Crontab-Spezifikationen zu akzeptieren. Hier also eine Handvoll Beispiele:
Wann
Crontab
OnCalendar
Täglich um Uhr
45 13 * * *
13:45:00
Alle 5 Minuten
*/5 * * * *
*:00/5:00
Montags, Mittwoch, Donnerstag um Uhr
14 9 * * 1,3,5
Mon,Wed,Fri 09:14:00
Montag bis Freitag um Uhr
0 4 * * 1-5
Mon..Fri 04:00:00
Jeden Monatsersten um Uhr
0 6 1 * *
*-*-1 06:00:00
Alle 5 Minuten von 06:00 – 17:55
*/5 6-17 * * *
06..17:00/5:00
⚠️ Achtung: In der Tabelle sind non-breakable Spaces enthalten. ⚠️ Die Werte sind somit nicht für copy&paste geeignet.
Zum Testen mit systemd-analyze wird die jeweilige Definition mit Anführungszeichen übergeben:
Alternativ, insbesondere bei hoher Ausführungsfrequenz oder bei Überschneidungsgefahr, benutze ich, wenn ich schon in systemd unterwegs bin, heute gern monotone Timer.
Versuche, hybride Timer mit Elementen aus beiden Timer-Typen zu konfigurieren, haben bei mir keine Fehlermeldungen produziert, aber der OnCalendar-Teil der Konfiguration wurde ignoriert. Das genaue Verhalten scheint nicht definiert zu sein.
WantedBy sollte bei Timern im Systemkontext auf timers.target lauten, da damit die NTP-Synchronisation vorm Start des Timer sichergestellt ist. Im Userkontext (Wallpaperchanger, Zeiterfassung, dies das) steht nur default.target zur Verfügung.
Inb4, warum überhaupt auf systemd-Timer statt crontab einlassen? Ganz einfach, weil systemd-Timer absolut narrensicher zu managen sind:
Du willst einen systemd-Timer verteilen/managen/paketieren? Kein Problem. Zwei Dateien nach /etc/systemd/system packen, systemctl daemon-reload, systemctl enable, fertig. Anders als in der Crontab musst du dir keine Meta-Syntax ausdenken, um zu identifizieren, ob der Eintrag schon da ist, und um ihn punktgenau löschen zu können.
Du willst einen vorinstallierten Timer anpassen? Ebenfalls kein Problem. Du legst ein Drop-In daneben, in dem du deine neue Timer-Spezifikation hinterlegst, etwa /etc/systemd/system/apt-daily.timer.d/local.conf als Drop-In für /lib/systemd/system/apt-daily.timer.
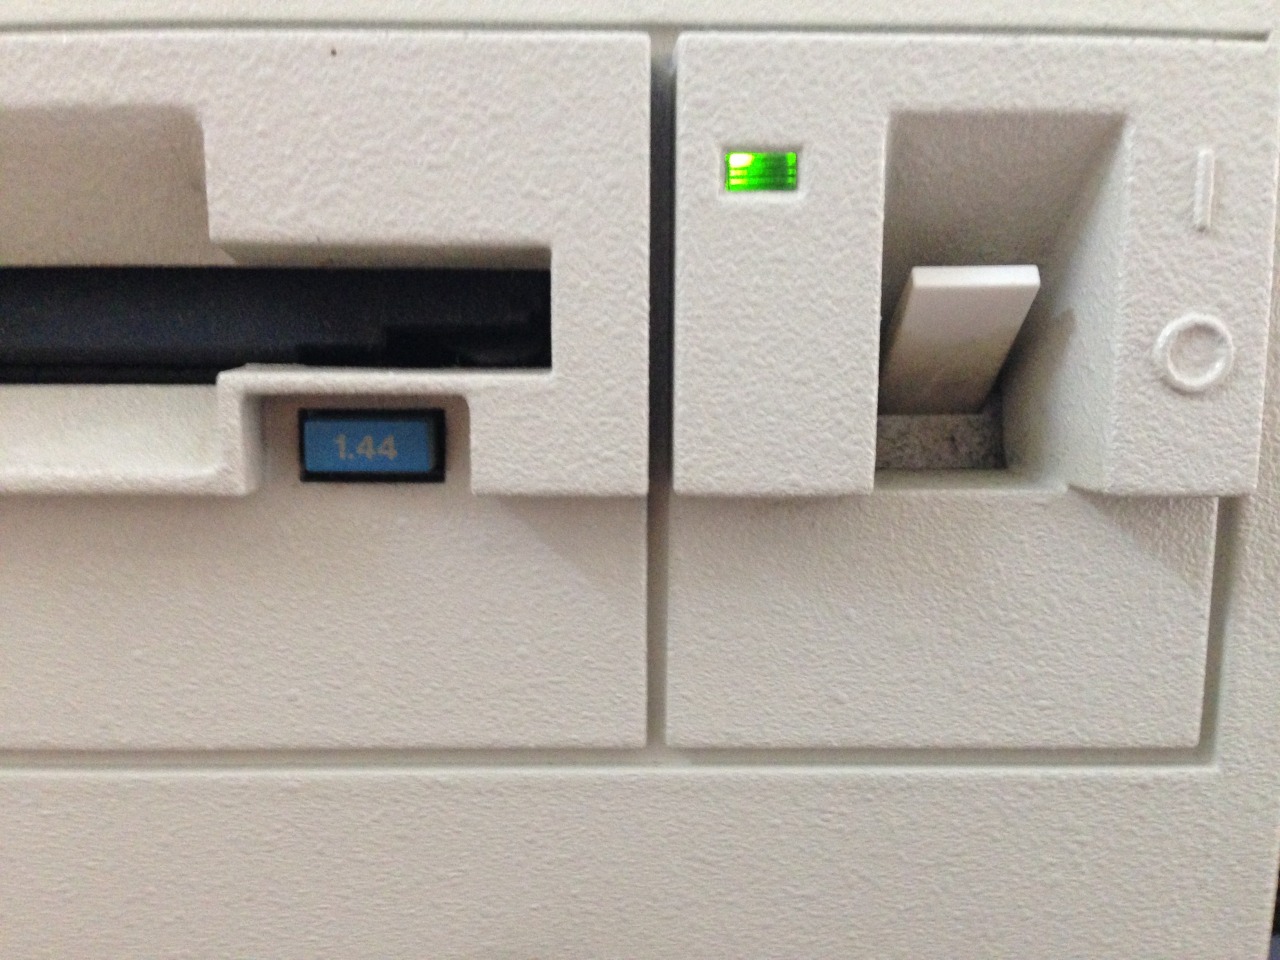
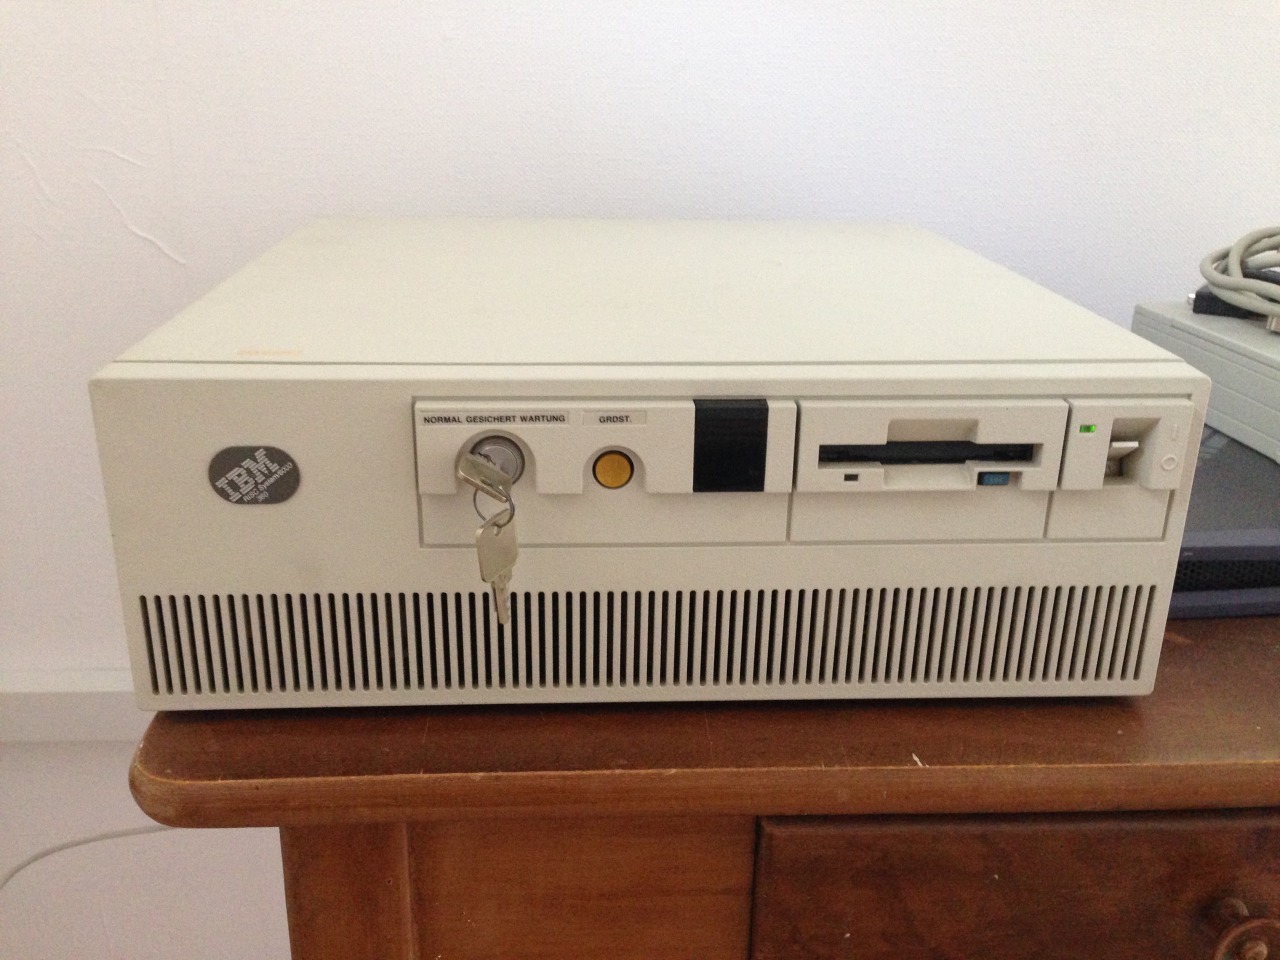
AUI-TransceiverTypenschildGehäuselogoDiskettenlaufwerk und HauptschalterGerät auf KüchentischBedienpanel
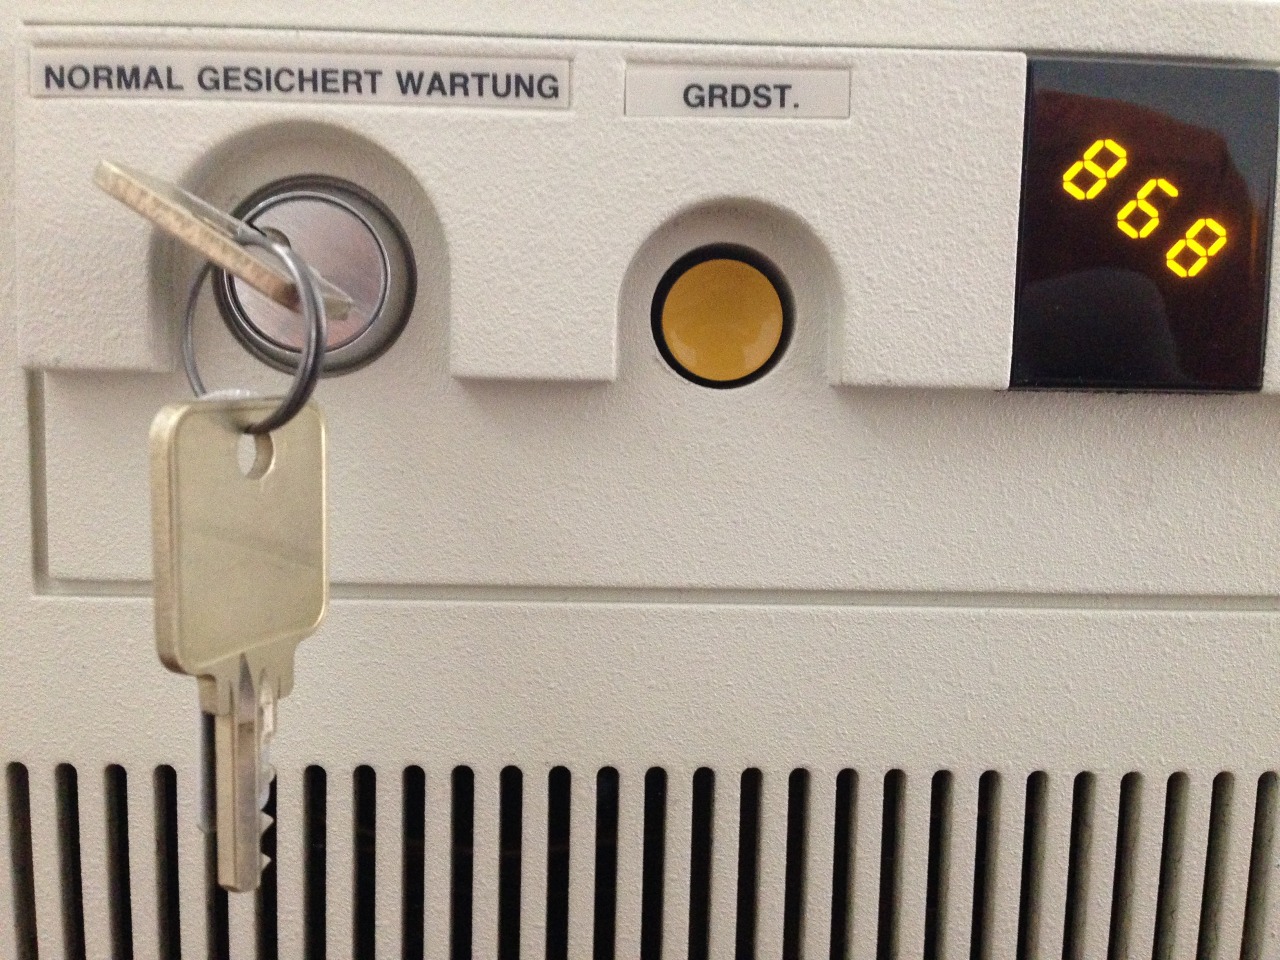
Von den Leuten, die uns “STRG”, “ENTF” und “EINFG” gebracht haben, ein Highlight, das sich leider nie durchgesetzt hat: Die GRDST-Taste.
Diese RS/6000 hat den Weg zu mir so um 2000 gefunden, als mein erster Vollzeit-Linuxjob noch ein paar Jahre entfernt war.
Damals kuschelte IBM etwas widerwillig mit Linux und hatte auf AIX 4.3.3 parallel zur Einführung von AIX 5L (das L sollte für die Nähe zu Linux stehen) RPM als additiven Paketmanager eingeführt. Die Liste der damals verfügbaren Pakete kann bei bullfreeware.com bewundert werden (hier ein lokaler Mirror). Ich habe zuletzt noch einige davon installiert, um das Tool zum Benchmarking übersetzen zu können.
Zur 7012 besitze ich auch noch das passende SCSI-CDROM mit der passenden obskuren Blockgröße. Installationsmedien sind aber keine mehr vorhanden. Die Demo-Installation mit User root und Password root muss also für immer halten. Außer AIX ist mir kein Betriebssystem bekannt, das auf dem System nutzbar wäre.
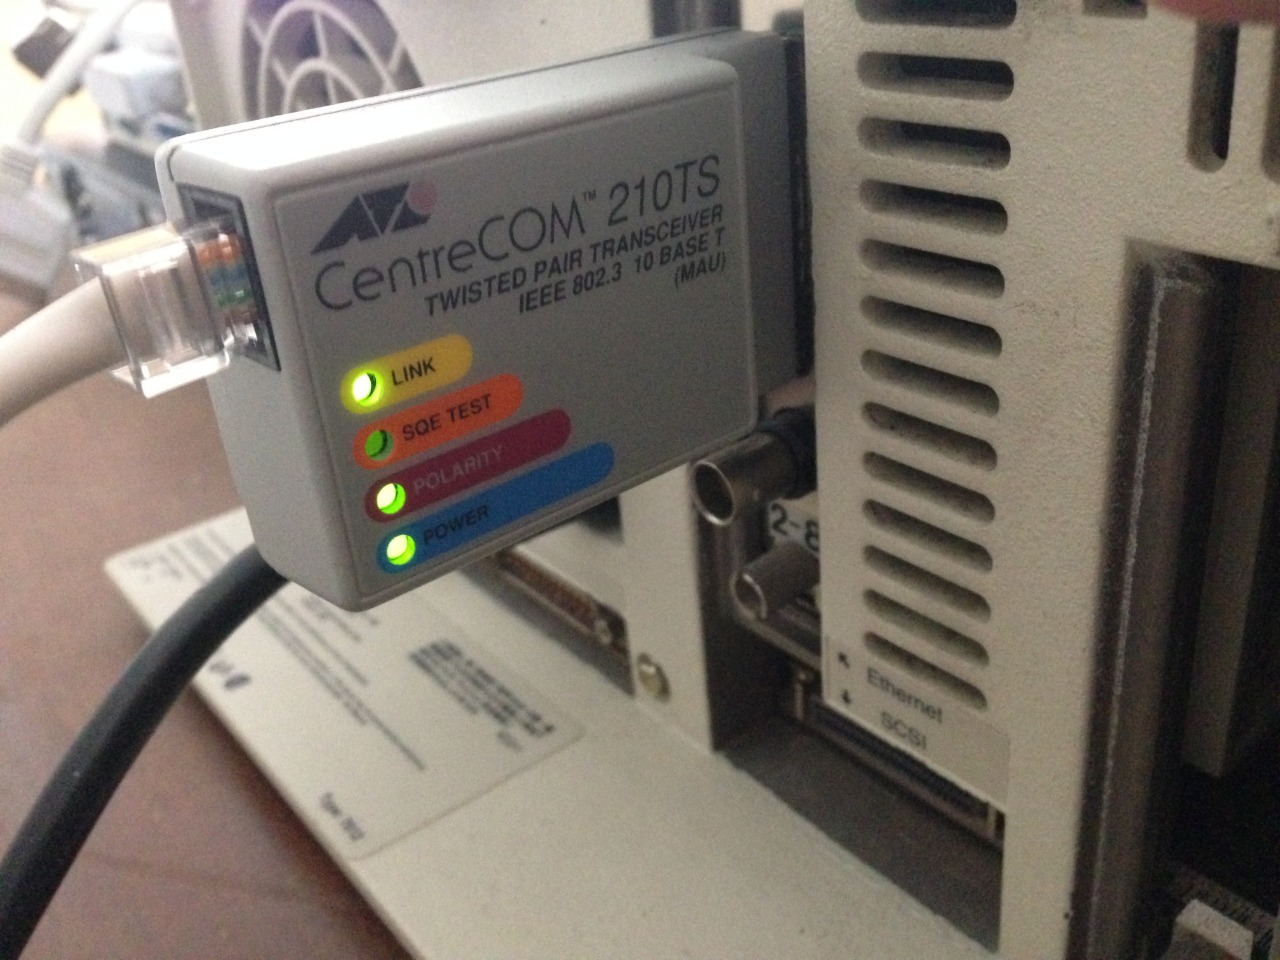
SSH fehlt, aber per Telnet über den wackeligen AUI-Transceiver mit 10 Megabit/s macht das System einen sehr guten und responsiven Eindruck, fast besser als heute manche VMware-Instanz. 😉
Die Towers of Hanoi aus dem BYTE Unix Benchmark führt die RS/6000 mit ca. 1050 Loops pro Sekunde aus. Ein halbwegs aktuelles Vergleichssystem mit Intel-CPU und 3,6 GHz kommt auf ca. 3200000 Loops pro Sekunde.
Divisionen in der folgenden Schleife macht die RS/6000 mit 16500/s (Perl 5.5 vorinstalliert) bzw. 14500/s (Perl 5.8 aus dem RPM); mein moderneres Vergleichssystem kommt auf knapp 7 Millionen/s.
Softwaretechnisch größtes Highlight dürfte das installierte Java 1.1.8 sein. IPv6 wird zur Konfiguration angeboten, funktioniert aber in dieser aus dem Jahr 1999 stammenden Implementation nicht wirklich zufriedenstellend.
Technische Daten: POWER1-Prozessor mit 50 MHz, 128 MB Arbeitsspeicher, 2 GB Festplatte. Produktionszeitraum 1993-1994. (Mirror vom Datenblatt)
(Dieser Beitrag stand 2014 schon mal an anderer Stelle. Die Benchmarks auf heutigen Systemen wurden aktualisiert und ein lokaler Mirror der Bullfreeware-Liste und des Datenblatts gesichert.)
Ich weiß jetzt wieder, wie ich Letsencrypt auf DNS Round-Robin mit zwei Servern aufgesetzt hatte und finde es auch mit einigen Jahren Abstand gar nicht mal so schrecklich.
Die Server kennen sich auf Port 80 unter ihrem Namen im Round-Robin und unter einem eigenen Rollennamen:
Was jetzt noch übrig bleibt, wird daraufhin geprüft, ob a) die angeforderte Challenge im Dateisystem nicht vorhanden ist und b) der Request an den Namen aus dem Round-Robin gestellt wurde (um endlose Proxy-Rekursionen zu verhindern). Falls die Challenge lokal nicht existiert, wird der Request per Reverse Proxy an einen nachgelagerten Server gestellt:
Mit 2 Servern ist klar, wo die Challenge zu holen ist. Bei 3 und mehr Servern würde ich eher nicht riskieren, in multiple Proxy-Weiterleitungen zu gehen, sondern mod_rewrite über RewriteMap aktiv ermitteln lassen, auf welchem der anderen Server die Challenge denn tatsächlich liegt.
What goes up, must come down. Ask any system administrator.