Figuring this out took me quite a bit of time. In the end, I approached the starter of this hilariously useless CentOS mailing list thread, who assured me that indeed he had found a way to configure MD-RAID in the installer, and behold, here’s how to install CentOS 7 with glorious old-school software RAID.
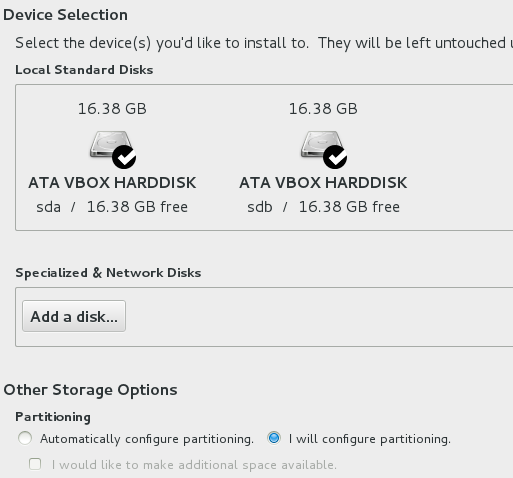
In the “Installation Destination” screen, select the drives you want to install onto and “I will configure partitioning”. Then click “Done”:
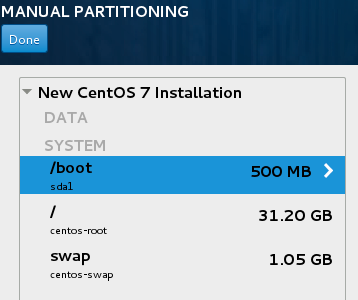
 In the “Manual Partitioning” screen, let CentOS create the partitions automatically, or create your own partitioning layout. I will let CentOS create them automatically for this test.
  Apparently due to restrictions in the Installer, /boot is required, but can’t be on a logical volume, so it appears as primary partition /dev/sda1. The root and swap volumes are in a volume group named centos.
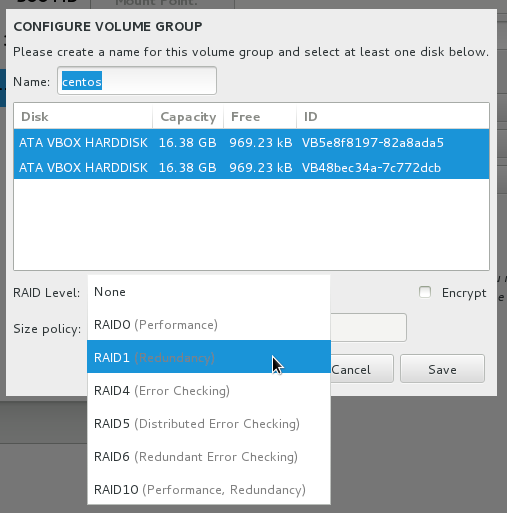
The centos volume group will need to be converted to RAID 1 first. Select the root volume and find the “Modify…” button next to the Volume Group selection drop-down. A window will open. In this window, make sure both drives are selected and select “RAID 1 (Redundancy)” from the “RAID Level” drop-down. Repeat this for all volumes in the centos volume group. If you are using the automatic partition layout, note at this point, how, after this step, the file system sizes have been reduced to half their size.
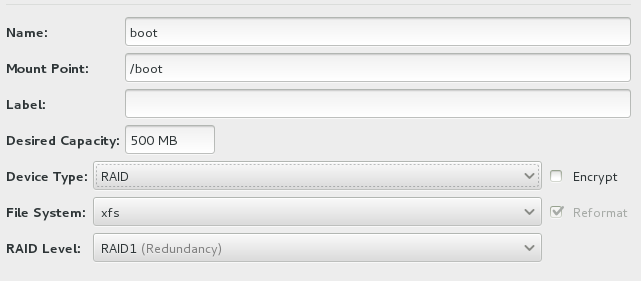
 As the final step, select the /boot entry and use the “Device Type” drop-down to convert /boot to a “RAID” partition. A new menu will appear, with “RAID 1 (Redundancy)” pre-selected. The sda1 subscript below the /boot file system will change into the “boot” label once you click anywhere else in the list of file systems.
 Click “Done”, review the “Summary of Changes”, which should immediately make sense if you have ever configured MD-RAID, and the system will be ready for installation.